Friday, May 13, 2011

How to build a Straw Bale Vegetable Garden


One of the simplest ways to create a raised bed vegetable garden is to build a Straw Bale garden bed. There are many methods and construction materials that can be used to create a raised vegetable garden, we have already looked at some in the vegetable garden design page, but the straw bale still remains one of the quickest, cheapest and easiest methods around. They also have the added bonus of being environmentally friendly!

Benefits of using Straw Bales

As we have already mentioned, bales are quick, cheap and easy to use, but they also have other added benefits that other methods do not.

No Dig - Straw bales can be used to create a no dig garden

Renewable - The straw does eventually compost down (another bonus)and when it does, it is easily and cheaply replaced.

Ongoing source of compost -As the bales break down, the straw can be used to mulch the bed.

Attract beneficial soil life - Because straw is a natural product and it composts down, when in contact with bare soil, straw attracts worms to the bed, that in turn condition the soil, as well as encouraging beneficial soil organisms that are crucial to healthy soil.

What straw should you use?
There are many types of straw/hay available depending on where the hay was cut. General paddock hay could be a mixture of grasses, where others such as Lucerne or Pea straw are bales made from straw of these specific crops. Because these are legumes, as they break down they help to contribute nutrients to soil. Lucerne and Pea straw bales are usually more expensive than pasture cut hay.


Lucerne hay is more coarse than pasture cut hay and usually has a dark green colour about the material, as opposed to the standard dried yellow colour of hay. Remnant leaves from the dried lucerne plant is normally visible in the compressed bale.


Pea straw has a different texture again to pasture cut hay and Lucerne. Also showing signs of dark green from the dried pea plants, pea straw will almost always have stray dried peas embedded in the straw. As a result, germination of these seeds is inevitable and all you have to do is pull them out of the bales as they geminate and leave them on the garden bed surface to die down and compost, otherwise you'll end up with a living straw bale wall!

How much does it cost?

The materials can be obtained at a cost as little as $50, but of course, this depends on the size of the bed you want (and therefore the number of bales needed)as well as the straw type chosen. Pasture cut hay is readily available in semi rural areas as land owners who have cut hay often sell it from the their properties. We are spoilt for choice in our area at the moment as the change in weather has resulted in bumper crops.

What do I need to build a Straw Bale bed?

This is the easy bit! All you need is a hammer, some sturdy garden stakes and the bales.

Ready to start?

Here's the how!
1 - Select an appropriate site. Refer to the garden design page on where to position your garden. Your site preferably should be level, but if this isn't possible, a gentle slope is acceptable. Steeper slopes can be handled by "packing" under the bales with "biscuits" from an opened bale.

2 - Clear the site. It is not essential that the site be spotlessly clear, you can build your raised bed, right over the top of unwanted grass, but if you have a lot of weeds, especially if they are flowering, it is best to remove them first. If building over grass etc, then the centre of the bed should be mulched. (dealt with later)

3 - Decide on the bed size. To some degree here, you are restricted by the standard size of rectangular straw bales. Although you can open a bale and reduce it's length, it is often difficult to re-tie the bale up to the same tension as the baling machine and this may result in the bale falling apart earlier.


Step 3 - As shown above, layout the straw bales to make a bed the size you want.

4 - Lay out the bales. Set out the bales to form the size of your desired new bed. Secure the bales in place by hammering two garden stakes in per bale, about 30cm from each end of the bale, driving them in down through the straw. make sure that the bales are butted firmly up against each other to ensure that the raised bed soil doesn't leak out between them.

Steps 4 & 5 - Stake the Bales in place using a decent weight hammer, drive the stakes down through the hay to lodge the bale in place. Hammer the stakes down so they are flush with the top of the bale, then fill the new garden bed.


5 - Prepare the soil.

Vegie Patch Examples

Click to Enlarge


Thursday, May 12, 2011

Markets – Gold coast


There are numerous markets located on the Gold Coast showcasing local produce and art and crafts from the region.

For further information regarding markets, please contact Alexandra Hardes, Gold Coast Parks on (07) 5581 7344. For information regarding pre-packaged foods for sale at markets, contact Health and Regulatory Services on (07) 5581 6220.

Broadbeach Art and Craft Market
Where: Kurrawa Park
Old Burleigh Road (opposite Mall), Broadbeach
When: 1st & 3rd Sunday of month, 8am - 2.30pm
Contact: Art & Craft on the Coast
Telephone: (07) 5533 8202
Email: info@artandcraft.com.au
Website: www.artandcraft.com.au

Burleigh Arts and Craft Market
Where: Justins Park
The Esplanade, Burleigh Heads
When: Last Sunday of month, 8am - 2.30pm
Contact: Art & Craft on the Coast
Telephone: (07) 5533 8202
Email: info@artandcraft.com.au
Website: www.artandcraft.com.au

Bundall
Where: Gold Coast Turf Club
Racecourse Drive, Bundall
When: Every Sunday, 6am - 11am
Contact: Michelle Nugent
Telephone: 0405 185 683
Email: michelle@yourlocalmarkets.com.au
Website: www.yourlocalmarkets.com.au

Carrara Market
Where: Cnr Gooding & Manchester Drives, Carrara
When: Every Saturday & Sunday, 6.30am - 4.30pm
Each Friday, 7am - 1pm (Farmers Market)
Contact: Carrara Markets
Telephone: (07) 5579 9388
Email: info@carraramarkets.com.au
Website: www.carraramarkets.com.au

Coolangatta Art and Craft Market
Where: Queen Elizabeth Park
Marine Parade, Coolangatta
When: 2nd Sunday of month, 8am - 2.30pm
(Plus 4th Sunday of five Sunday months)
Contact: Art & Craft on the Coast
Telephone: (07) 5533 8202
Email: info@artandcraft.com.au
Website: www.artandcraft.com.au

Coomera Market
Where: Assisi College Carpark
Billinghurst Crescent, Upper Coomera
When: Last Saturday of month, 6am - 12noon
Contact: Corinne Tench
Telephone: 0424 189 344
Email: corinnetench@hotmail.com

Currumbin Valley Community Markets
Currumbin Community Farm Campus
1226 Currumbin Creek Road, Currumbin Valley
When: Last Sunday of month, 9.30am - 2pm
Contact: Andrew Lock
Telephone: (07) 5533 0312
Email: alock16@eq.edu.au
Website: www.currumbinfarmschool.eq.edu.au

Miami Organic Farmers Market
Where: Miami State High School
2137-2205 Gold Coast Highway, Miami
When: Every Sunday, 6am - 11am
Contact: David Whyle
Telephone: (07) 3358 6309 or 1300 668 603
Email: info@gcorganicmarket.com
Website: www.gcorganicmarket.com

Marina Quays Village Markets
Where: Village Square, 2 Sickle Ave, Hope Island
When: Every Saturday and Sunday
Time: 7am - 3.30pm
Contact: Nikki Hudson
Telephone: 0418 151 643
Email: markets@marinaquays.com.au
Website: www.mqmarketvillage.com.au

Monaco Markets (Preloved & New Fashion and Art & Craft)
Where: "Monaco Centre"
Cnr Rio Vista Boulevard & Monaco Street, Broadbeach Waters
When: Last Sunday of each month
Time: 8am - 12pm
Contact: Coffee Sisters
Telephone: (07) 5538 5655
Email: sales@monacomarkets.com
Website: www.monacomarkets.com

Mudgeeraba Farmers Market
Where: Mudgeeraba Showgrounds
Cnr Mudgeeraba & Worongary Roads, Mudgeeraba
When: 2nd & 4th Saturday of month, 6am - 11am
Contact: Paul Armstrong
Telephone: 0438 163 186

Nerang Fresh Produce & Craft Market
Where: Lavelle Street, Nerang
When: Every Sunday, 6.30am - 12 noon
Contact: Liana Baffari
Telephone: 0417 728 844
Email: info@goldcoastfarmersmarkets.com.au

Palm Beach Currumbin
Where: Palm Beach Currumbin State High School
Thrower Drive, Palm Beach
When: Every Saturday, 6am - 11am
Contact: Michelle Nugent
Telephone: 0405 185 683
Email: michelle@yourlocalmarkets.com.au
Website: www.yourlocalmarkets.com.au

Paradise Point Art and Craft Market
Where: The Esplanade Parklands, Paradise Point
When: 4th Sunday of month, 7am - 2pm
Contact: Julie Pearson or Sharyn Robb
Telephone: 0417 636 662 or 0407 636 822

Runaway Bay Zero 2 Five Market
Where: Runaway Bay Indoor Stadium
Sports Avenue, Runaway Bay
When: 8 April, 20 June, 22 August, 17 October & 5 December, 9am - 12pm
Contact: Karren Hackling
Telephone: 0433 831 140
Email: info@zero2five.com.au
Website: www.zero2five.com.au

Southport
Every Saturday
Southport Sharks AFL Football Club
Sharks Farmers Market
Corner of Musgrave and Olsen Avenues
Open 6.30am - 12 noon
Phone: (07) 5532 1155
Website: www.southportsharks.com.au

Surfers Paradise Beachfront Market
Where: The Esplanade, Surfers Paradise
(Between Elkhorn Avenue & Cavill Mall)
When: Every Wednesday & Friday night, 5.30pm - 10pm
Contact: Surfers Paradise Alliance
Telephone: (07) 5584 3700
Email: markets@surfersparadise.com
Website: www.surfersparadise.com

Upper Coomera Zero 2 Five Market
Where: Upper Coomera State College
Reserve Road, Upper Coomera
When: February 27, April 10, June 19, August 28, November 20, 9am - 12pm

Sports Avenue, Runaway Bay
Where: Runaway Bay Indoor Sport Centre
When: April 3, August 21, October 23, December 4, 9am - 12pm
Contact: Karren Hackling
Telephone: 0433 831 140
Email: info@zero2five.com.au
Website: www.zero2five.com.au

The Village Markets (Burleigh)
Where: Burleigh Heads State School
Lower Gold Coast Highway, Burleigh Heads
When: 1st Sunday of month, 8am - 1pm
Contact: Sarah or Marissa
Telephone: (07) 5679 0375
Email: stalls@thevillagemarketsgc.com.au
Website: www.thevillagemarketsgc.com.au

Markets – Sunshine coast


Wednesdays
•Eumundi Markets - Memorial Drive, Eumundi, 8am to 1.30pm
The Eumundi Market is the biggest on the Sunshine Coast and one of the biggest in Queensland. Any Wednesday or Saturday of the year around 10,000 locals, interstate and international tourists come to enjoy the atmosphere, the fun and of course the multitude of arts, crafts and produce on display, over 300 stalls of them in fact, as well as music and street theatre.

Thursdays
•Cooroy Community Market - R.S.L. Hall Maple St, Thursdays 8am - 1.30pm

Saturdays
•Cooran Eco Markets - King St Cooran, Pioneer Park, every 1st & 3rd Saturday of each month
Set amongst the beautiful shady hinterland of Cooran (5 mins north of Pomona) with a friendly family atmosphere and children park beside it. Expect to see a range of fresh local produce, plants, homemade food, live music, jewellery and Art & Craft. Contact - Shane Murray: 5485 2767, Mark Steer: 5485 2526
•Suncoast Growers Market - Suncoast Christian College, 7 - 13 Kiel Mountain Rds, Woombye, every Saturday, 6.30am to 12pm. Contact Helen on 0416 217 093 for more information.
•Pomona - beside Stan Topper Park every second Saturday, 6am to noon every second and fourth Saturday
•Eumundi Markets - Memorial Drive, Eumundi, 6.30am to 2pm
The Eumundi Market is the biggest on the Sunshine Coast and one of the biggest in Queensland. Any Wednesday or Saturday of the year around 10,000 locals, interstate and international tourists come to enjoy the atmosphere, the fun and of course the multitude of arts, crafts and produce on display, over 300 stalls of them in fact, as well as music and street theatre.
•Yandina Plant and Produce Markets - Yandina Sports Grounds (Wonga Park), 7am to noon
•Beerwah Village Craft Markets - first Saturday of each month, 8am to 1pm
•Coolum Market - CWA Hall, Coolum Terrace, first Saturday of month, 8am to noon
•Landsborough Country Markets - Memorial Hall, Peace Park, Maleny Rd, Landsborough, 8am to 1pm
•Mapleton Markets - Mapleton Hall Grounds, Obi Obi Road, Maleny, first Saturday of the month 8am to 12.30pm
•Kenilworth Country Markets - CWA Grounds, Elizabeth Street Kenilworth, first & third Saturday of each month, 8am to 1pm
•Yandina Makers Market - Anglican Church Grounds, Farrell Street, Yandina, 9am - 1pm
The Yandina Maker's Market is designed for locals and tourists to "Meet the Maker". The new market will showcase local artisans who proudly make their own products in a environment free from imports. Handcrafted jewellery, clothing, henna, art/photography, and candles are included among the stalls. Contact Dennis Sutton 07 5472 7409 or 07 5472 8710

Sundays
•Caloundra Country & Farmers Market
Every Sunday in Arthur Street - 7am to 12 noon
All your Fresh Fruit & Veg. Flowers & Plants.
Fresh Seafood, plus Hand-made Clothes, Craft, Tools, Books & Collectables
Car Boot Sales and New Stall Holders Welcome
Ph 0401 482 949
•Buderim Sunday Markets - in the car park behind the old Buderim Post Office, Lindsay Rd, Buderim, second and fourth Sunday of the month, 8am - 12 noon
•Eumundi Collectables Market - Butter Factory, 124 Memorial Drive, Eumundi, 8am to 2pm
•Nambour Sunday Markets - Nambour Showgrounds 7am to 12 noon
•Caboolture Markets - Caboolture showgrounds, Beerburrum Rd, Caboolture, 6am - 12 noon
•Noosa Marina Markets - 2 Parkyn Court, Tewantin, 8am - 2pm. The Noosa Marina art, craft and local produce market has an idyllic setting on the deck, overlooking the Noosa River.
•Lions Club of Mooloolaba Sunday Markets
Cnr Fishermans Road and David Low Way, Maroochydore
Held every Sunday between 6am to 12 noon
Phone 0429 109 149 for enquiries and bookings.
•Maleny Art Craft & Collectables Market -
RSL Hall Bunya Street, Maleny
Held every Sunday 8am to 2pm
Please contact 0448 423 919 for more informations
•Cotton Tree Markets - King Street, Cotton Tree, King St, 7am to 1pm
•Peregian Beach Markets - Kingfisher Drive, Perigian Beach, first, third and fifth Sunday of the month, 7am -12.30pm
•Caboolture Show Society Fleamarket - Caboolture Showground, Beerburrum Road, Caboolture, 6am until noon
•Peachester Markets - Peachester Hall, 9am to 2pm
•Woodford Country Markets - Archer St, Woodford, third Sunday of every month,6am-1pm
•Queensland Cancer Fund Markets - First Ave car park, Bongaree, Bribie Island, first Sunday of each month, 8am - 12 noon

Wednesday, May 11, 2011

Growing Corn


Sweet Corn/Maize
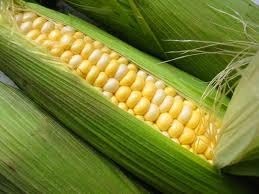
Corn originated in America and was grown by the Indians; it belongs to the grass family.

There are a number of heirloom varieties of sweet corn and maizes with different shapes and sizes. There are golf ball shapes, bantam and lady-finger shapes. There are a large variety of colours; multi coloured, blue, red, white, purple and the typical golden yellows and not forgetting 'pop corn'.
Eden Seeds carries a good variety of the old traditional open pollinated seeds,(heirloom seeds). They also have a new seed catalogue coming out shortly.

When to Plant
The best time to sow corn seed is the end of August and September (early to late spring). Before planting out your corn, soak the seeds in a container of water overnight. You can either sow the seeds directly into the garden, 25mm deep (1"), 150mm apart (6") and in rows around 300mm (1') apart, or in seed trays.

By sowing your corn seed directly into the garden you do not necessarily get a 100% strike; you may have breaks in your rows. Try growing your corn in seed trays or in punnets, then transplant the seedlings out into the garden, when they are 50 to 75mm tall. You will then have complete rows.

Corn needs to be planted closely in a group to facilitate pollination. Plant a hand span apart. You could also try planting your corn in a circle. Another way to plant corn is to hoe out 6-off rows 150mm deep x 2m/s long, fill with chopped up comfrey leaves, (if you don't have any comfrey use compost). Cover over with soil, then sow your corn seeds 25mm deep/150mm apart and water them in (a good soak).

Corn likes lots of compost, comfrey, old animal manures, liquid fertilisers and heaps of mulch (around the main stem of the plant) give them a good soak around the roots, every second day, depending on the weather conditions.

If you have a small garden and are in need of space, you could also plant climbing beans and cucumbers in between the rows of corn, the beans and cucumbers will climb up the corm stems, making a temporary trellis. The seed for the beans and cucumbers need to be sown out at the same time as the corn.

Hints and Tips
A good tip is, once the corncob has been pollinated (the corncob tassels have gone brown and you can feel the cob forming) cut the top flower off about a 100mm up from the cob. Hopefully this will let the plant concentrate on feeding the cob, making it grow larger and sweeter.

Wind
A problem for the home gardener is wind. Your corn is growing great, nearly as high as an elephants' eye when along comes the wind and down goes your best crop of corn or, worse still you are out in the middle of a storm trying to stand it up with sticks and a ball of string.

One way that will save you all that stress is, after you have planned out where you are going to grow your supper crop of corn, hammer in tomato stakes or bamboo sticks every 1.8 metres apart, around the perimeter and down the centre of the corn plot. When the plants are a 1 metre high, horizontally tie (with wire) a stake or bamboo stick on to the stakes, like a top rail on a fence. As the corn grows, lift the horizontal rail higher; this will more than support your corn from strong winds.

Pest
Corn earworm is the major pest for sweet corn. They munch on the top of the cob working their way down. You don't realise that they are there until it's too late. Sometimes they will leave a telltale sign that they are there, by leaving a sawdust trail on the top/outside of the cob.
If you see this sawdust trail pull the top of the cob apart, grab the grub and squash it, or you could feed it to the chooks. Don't just throw it on the ground as it will continue its cycle. Re-cover the cob, wrap an elastic band around the top of the cob. This will stop the cob from drying out and stop other bugs getting in.

Saving Seed
'Corn Seed' being an 'air pollinated plant' needs at least a 2 kilometre distance between crops as corn will easily cross pollinate with the local farmer or your neighbours crops. If this happens, there goes your true to type seed.

If you are going to save seed ensure it has not been cross pollinated or that it is not seed from a hybrid plant as hybrid varieties may not produce fertile seed. If you use these seeds you won't know until it's too late and the cobs have not pollinated, this could take up to eight weeks.
Please ensure that the seed is from a healthy non-hybrid plant - an 'old variety'.
If you don't know, don't use that particular seed for the next season's crop, buy fresh seed.

To save corn seed pick the earliest and the best-developed corncob, cover with a large enough paper bag and tie the top to keep the bugs and grubs out.
Do not use a plastic bag as the cob needs to breathe. Allow the cob to develop and dry out on the stalk as long possible. To store the cobs remove them from the bag, pull back the husks and hang in a dry area, away from vermin or you will end up with a dried out corncob with no seed.

When the cobs are fully dried out break-off the seed, store in a paper bag and keep in a cool place, the bottom of the fridge is a good spot. Good seed should be viable for at least a couple of seasons (two years).

You can buy non-hybrid seeds from Eden Seeds a $1.80 a packet contact no 1800 188 199.

Diseases.
Diseases that attack Corn are mainly fungi and viruses.
Crops planted late in the season are more than likely to develop these diseases. Providing you plant out your crop at the right time of the year and have a happy well composted garden, use liquid fertilisers and rotate your crops, you will have healthy strong plants.

With having healthy strong plants there will no need for any control methods.

Storing Corn.
A corn crop matures all at the same time. Fortunately corn freezes very well. Freeze the corn when it is at its very best and, to ensure the highest nutritional value, as soon as possible after it has been picked.

Bring a large saucepan of water to the boil. Drop in prepared corn cobs, don't overcrowd, and leave them in the boiling water for seven minutes - that is actual time, not after the water comes back to the boil. Drain and cool as quickly as possible by running under cold water and then standing in iced water. Pat dry.
You may like to freeze a few whole cobs but I prefer to scrape the corn off the cob. It has more uses this way, keeps better and takes up less room in your freezer. Pack the corn kernels in plastic bags in meal sized portions. Pat the bags flat, remove any air and seal. Spread packets out in the freezer so they freeze as quickly as possible. It takes a bit of time and room so if you have a huge amount of cobs, do the picking and preserving over two or three days.

If you don’t have a freezer you will be popular with your friends and neighbours for a few weeks or you could try corn relish; -
One litre cider vinegar, 220 grams sugar, one quarter of a white cabbage, two onions, two capsicums (vary the colours), one kilo of corn kernels, two tablespoons cornflour.

One teaspoon of salt, one teaspoon turmeric and three teaspoons of mustard.
Chop and shred the onions, cabbage and capsicum very finely. Bring the vinegar, sugar and condiments to the boil. Add the vegetables and bring back to the boil. Add the flour dissolved in a little water. Simmer the mixture gently, stirring often, until it becomes thick - about 30-40 minutes.
Pour the relish into hot sterile jars and put lids on loosely. Screw the lids tightly down when the relish has cooled.
The jars can be heating (and sterilising) in the oven while you cook the relish.

Corn is delicious and nutritious and well worth the effort of growing.

Tuesday, May 10, 2011

SELF-SUFFICIENCY SEED COLLECTION


Two years seed supply
The more we take responsibility for our own food the less prone we will be to natural or technological disasters. Start now to grow some of your food and learn to save seeds and exchange them.

A lifetime garden can result
A cottage garden, even a window box, keeps growers in touch with nature. It is self empowering. Eat what is in season and preserve surplus and exchange with friends and neighbours.

Wouldn’t it be good if there was no longer any need for Eden Seeds to be concerned about our endangered food heritage?

The following seed is included in the Towards Self Sufficiency collection. The variety selection is our choice.

PACKETS
Amaranth-Leaf 1
Broad Beans 2
Button Squash 1
Cabbage 4
Capsicum 2
Cauliflower 2
Chilli 1
Celery 1
Cucumber 2
Eggplant 2
Gourd 1
Lettuce 6
Mustard 2
Pumpkin 3
Rockmelon 1
Salad Greens
- Corn Salad 1
- Mizuna 1
- Rocket 1
- Tatsoi 1
Shallots 2
Silverbeet 3
Spinach 4
Sunflower 2
Tomato 6
Turnip 2
Watermelon 2
Zucchini 4

HERBS
Basil 2
Calendula 1
Chives 2
Coriander 2
Dandelion 1
Dill 1
Echinacea 1
Marjoram 1
Nasturtium 2
Pigeon Pea 1
Oregano 1
Parsley 2
Pyrethrum 1
Rosemary 1
Sage 1
Thyme 1
Zinnia 1

BULK
Beans 400g
Beetroot 50g
Broccoli 20g
Carrots 50g
Onions 20g
Peas 400g
Radish 50g
Sweet Corn 400g
Normally at least $326.00

Special Offer $261.00 (including postage and handling)


________________________________________
SPECIAL OFFER!

26 different packets of our old traditional vegetable seed

$66.50 including postage and handling. Worth $88.20

A great gift idea for a friend!

And a good treat for yourself. Our selection which includes:

Bush bean, climbing bean, beetroot, broccoli, cabbage, chinese cabbage, capsicum, chilli, carrot, celery, sweet corn, cucumber, eggplant, lettuce, pumpkin, radish, rockmelon, rocket, shallots, spinach, button squash, sunflower, tomato(2), watermelon, zucchini.

Please note: The "26 packet special offer" is only available as our pre-selected set, if you would like to order your own selection then the normal rates apply ($3.20pp + P&H).
________________________________________
Contact & Ordering Details:
Select Organic
M.S. 905
Lower Beechmont 4211
Phone: (07) 5533 1177
Fax: (07) 5533 1108 (anytime)

http://www.edenseeds.com.au/content/default.asp

Monday, May 9, 2011

How to Grow and Harvest Bananas


Grow Bananas
It's quite possible to grow banana trees, even in cold climates. Banana trees aren't actually trees at all but are large perennial herbs native to the tropics. They grow quickly although it takes 10 to 15 months for a banana tree to actually produce bananas. They don't need a lot of maintenance, so just be sure to water and fertilize them regularly.

Instructions
things you'll need:
•Banana tree
•Shovel
•Water
•Fertilizer
•Mulch
•Pruning shears

1 Obtain a baby banana tree. You can buy these at nurseries, through catalogs or on the Internet. You can buy banana rhizomes or suckers or you can buy small banana trees that are already planted in containers.

2 Select a site for the banana tree. You want a place that is warm, protected from the wind and exposed to full sun. Twelve hours of sun a day is ideal. The soil should be light and well-drained.

3 Plant the banana tree. If it's a small tree in a container it can be planted like any container plant. If it's a rhizome, dig a hole about a foot deep and a foot wide. Put the rhizome in the hole and cover it with dirt.

4 Keep the area around the tree free of weeds. A layer of mulch will help choke out weeds.

5 Water the tree lightly at first. Water it whenever it seems dry but you don't want standing water around the tree at any time. Add some fertilizer to the water before watering the banana tree.

6 Remove any suckers that appear at the base of the tree after it's about 3/4 grown, except for one. Allow one sucker to remain.

7 Prune the leaves and remove dead leaves, if you want. The banana tree doesn't need much pruning.

8 Harvest a bunch of bananas when they're plump, round and no longer have ribs. It will take a while before you actually get bananas, so be patient. You can harvest them by the bunch or individually. They will still be green and will ripen on their own after they're removed from the tree.

9 Cut the banana tree down after it has produced bananas. The sucker that was left over from step 6 will now grow into a new banana tree and produce more bananas.

Tips & Warnings
•Select a cold-resistant variety if you're in a cold climate. These include Musa Basjoo, Saja and Ice Cream.
•It takes a long time for a banana tree to actually grow bananas. In cold climates you might not have enough time unless the banana tree can spend the winter in a greenhouse.
•Speaking of cold climates, bananas don't like frost or cold. Cold-tolerant varieties can survive the winter if you cut down the plant and cover the roots with a thick layer of mulch and a plastic sheet to keep them warm. You could also dig up the plant or just the roots, put it in a container and bring it inside. Put it in a sunny place and treat it like a houseplant.
•Some banana trees are strictly ornamental. If you want to try to grow bananas you can eat, be sure you're not buying an ornamental plant.
•If you're planting more than one banana tree, put them about 10 feet apart.